THE ULTIMATE CHEAT SHEET ON ROCK CLIMBING PHOTOGRAPHY
It is hard to take rock climbing photographs that are interesting.
You can improve your odds of landing awesome climbing photos by following 10 simple tips.
And in today's post, I’m going to share those tips so you can land one of a kind shots.
1) Find Something Unique
Find unique viewpoints and angles.
Ignore what other photographers are doing, and start doing what looks great to your eye.
Find unique subject matter.
Remember Its not about the climbing route. It is about the people, the breaks, chalking up, scary routes, plants, and animals.
Whatever climbing means to you, express that in your climbing pics.
Pro Tips
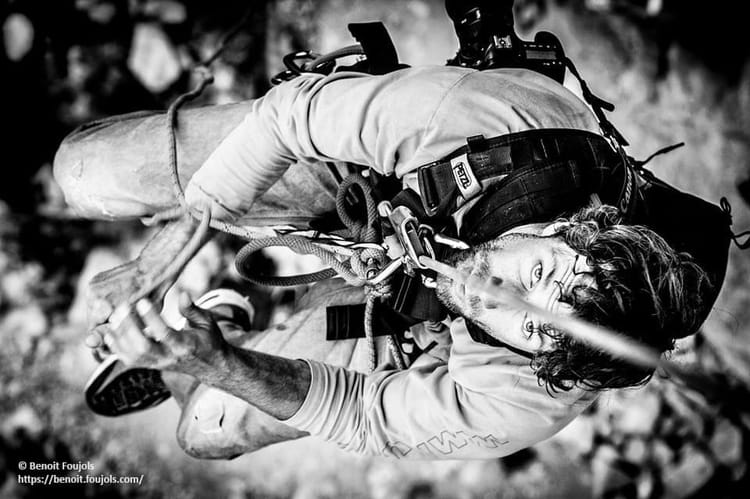
- Avoid the "butt shot" i.e. looking up from the belayers stance at the climber in the sky.
- Get above, below, shoot through trees, through cave entrances.
- Don't cut off limbs. Try to show at least three points of contact with the wall at all times.
- Shoot the hard moments. Like those difficult crux moves. The climber sitting in their harness after they missed that crux move make great moments.
- Get some faces in those photos. Great way to show the emotions of the moment.
- Catch the natural colors. In rock layers, trees, and other natural elements in your compositions.
- Use rivers, trails, ropes as leading lines that lead into the frame.
2) Put in the Work
Hiking to the crag with your camera pack and your climbing gear is a pain. But no one else wants to either. If you put in the work you'll already be ahead of the game, and much closer to finding something unique.
Extra work includes safety. Rigging your ropes, anchors, and choosing the right vantage point takes some thought. Getting yourself in the places you want to be is often hard work.
It is an investment but it will pay off with cool shots.
3) Incorporate Natural Elements
We all hike, climb and play as much as we can in places that are beautiful. Don't forget to include this in your amazing rock climbing photos.
Pro Tips
- Use landscape composition tips: something in the foreground, middle, and the background.
- Use trails, rivers, or rock features as compositional elements.
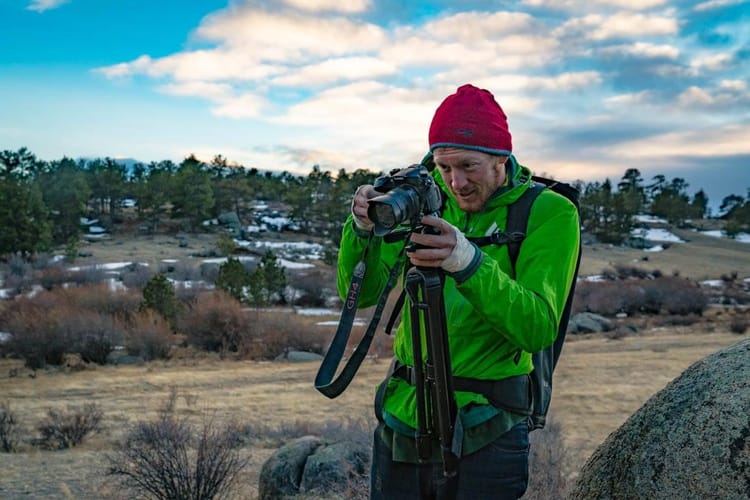
4) Know your gear
You have to think fast and know your gear well enough to capture moments as they happen.
You've also got to know your climbing equipment so you can stay ahead of your athletes.
Climbing Gear
With climbing photography, there are a lot of moving parts. Many of them have the potential to hurt people.
When cameras, lenses, filters, or bags get dropped it is a bad day.
But when you drop something like that 40 feet up the wall it could hurt or kill someone.
So the lesson of the day: Don't drop anything!
Photography Gear
Keep your climbing gear backed up, and your camera gear tethered and attached. Everyone will be happier this way!
Whether you are jugging up a static rope or rappelling down from the top. Think about what camera gear you might need and only take that up with you.
If you know you won't get close enough to use the fisheye do yourself a favor and leave it on the ground.
You'll have athletes performing some crazy hard stuff for you so make sure you can deliver the shots.
Know your camera basics. Things like composition, shutter speed, aperture before you leave the ground. It is easier when you’re on the wall.
This helps you focus, pun intended your time on keeping yourself safe. Then getting those sick rock climbing photos.
Pro Tips
- An aperture of f/5.6 is a good starting point, and depending on the light a shutter speed of 1000/sec or faster is great.
- Know how to build an anchor and rig your static line safely.
- Know how to backup your systems. This is for you and your ascending/descending gear. Get someone to double check before you leave the ground.
- You never know when you’ll need rope rescue skills so take a class and practice in the case of emergency.
- Wear a helmet. Brain protection is pretty cool these days.
5) Simplicity rules everything
Simplicity is great. Things are already complex enough, it's a lot to wrangle ropes, knots, backups, biners, slings. When you mix camera equipment with creativity. Be careful to avoid complexity wherever possible.
Another reason for simplicity is to find a system that works for you and develop some muscle memory.
Most climbers are familiar with this already. i.e. the locking biners go on the right of my harness, the slings around my left shoulder, etc.
I always take my right handed ascender, the yellow aider, the sling for my camera has the green colored biners on it. Always change lenses or accessories over the opening of a bag, etc.
Over time you’ll develop habits, and it will become second nature.
Pro Tips
- Don't change lenses, accessories, cards or anything else in a way that would allow it to drop. Over a hip pack is usually a good solution.
- I often use Ropeman ascenders to backup my bag and camera to the rope while I work.
- Practice these skills in a safe environment such as at home or at a gym.
6) Have Clear Intentions
Start the day's shooting by defining what your goals are.
Is it to have a great day climbing with friends? Or is it to take great photographs? Is this a shoot for a client, or for your portfolio.
Both call for different planning, different levels of effort, and different gear.
Try to set expectations with yourself. Communicate with the people you're climbing with what my goals are for the day.
Setting Expectations
To communicate your goals ask yourself what you are trying to do.
Is this to build your portfolio? Build an image library for stock? Or creative development?
If this shoot is for a client, they will define the goals for you. Your goals help define expectations. This is the first step to communicating those to your team.
Tell your athletes where to be at key moments to ensure the best possible photos. As well as whether you'll be shooting tight in on them, or wide.
Being in Control
There’s a safety element to this. You are the photographer and need to guide the shoot because if someone gets hurt you might have some fault.
Setting expectations for yourself and your athletes. It establishes you as being in control and knowledgeable.
Gather team input because they may have different ideas than you, or may have safety concerns. They may also have shots they want to get from the day, so be open.
But it is up to you to ensure everyone is safe, and you get the shots that you need.
Pro Tips
- Tell your athletes what your goals are, where you'll be on the wall, and what kind of shots you'd like to get.
- Be collaborative. Your athletes are putting their safety on the line for your camera, often without pay. Make sure they feel included in the process because you couldn't do it without them.
- Ask if they have sponsor needs. Many athletes have sponsorships or working toward that. Ask them if they need specific climbing photos.
- Don't be afraid to ask for help. Chances are you aren't as strong a climber as they are, and they can often help fix a rope for you or double check your gear. Don't let your pride or ego get in the way.
7) Be Real
Be real with yourself and with those around you.
You won't be successful as a photographer if you are pretending to be something you aren't.
Look
At the end its about being real with yourself and improving.
It’s ok to acknowledge you are starting out. Or that you get sketched out by the crazy exposure.
If you want to try something creatively that may not work out. Acknowledge it, own it, and do it.
Pro Tips
- In the climbing community credibility counts. If you are faking your skills it’s going to be obvious.
- Are your athletes being real with you? Can your athlete actually lead that 5.13b route or are they pushing it for the camera? It happens.
- Don't risk anyone's safety. Tell your partners about your experience level.
8) Climbing is a Community
To shoot climbing and find the depth. It does help to understand it. To understand it, you gotta live it and love it.
Talk to people at the climbing gym. Talk to people at competitions, send people a message on social networks.
If you want to shoot with people don’t hold yourself back. Reach out and ask them. Ask as many people as you can.
Climbers love to climb.
Make friends and put yourself out there. It’s hard as a photographer, but get out there and make your art. The more you shoot the better you’ll be at it.
Pro Tips
- Reach out to climbers on social networks. Ask for friends to refer you, make your face known at the local climbing gym. Shoot with as many people as you can.
- Give climbing a try if you haven't already. Understand the movement, the people, and the culture.
9) Chase the Light
A basic tenet of photography is that the best light is dusk and dawn.
It’s hard to push yourself. To get up super early and get to the crag, then get your ropes rigged and get on the wall before the sun rises.
But it definitely will make your work that much more appealing if you do it.
Light is also about shadows. Light and dark can are compositional elements. This is a tricky juggling act to expose for these situations, but if done right.
Just Experiment!!
Pro Tips
- Do your research to find out where the light will fall, when its best, and plan to be there at that time.
- Not all shadows are scary. Use them in your compositions, and experiment.
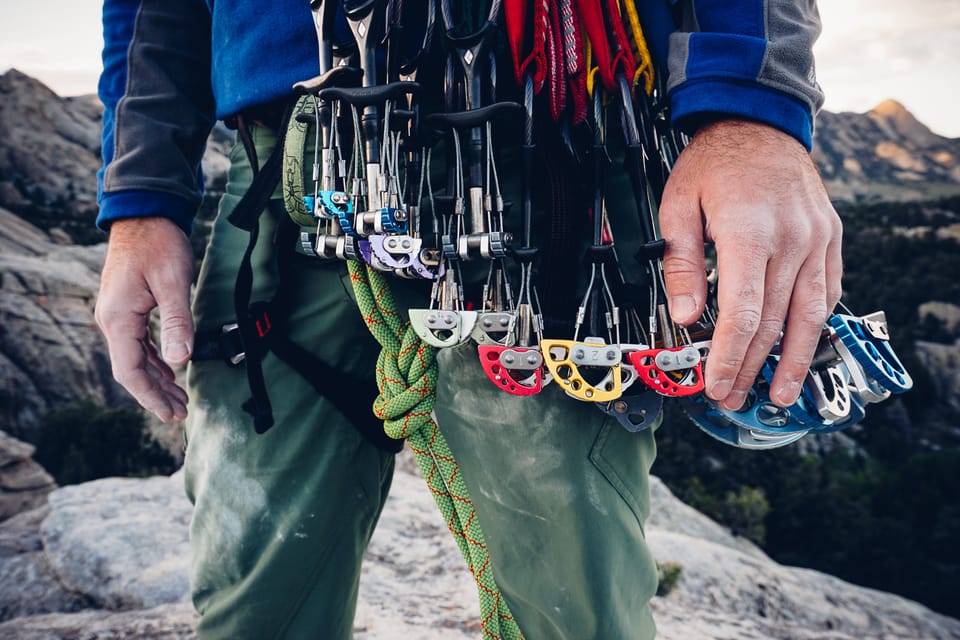
10) Shoot the Details
There are a lot of details in with climbing. Chalk bags, climbing shoes, beat up clothes, beat up hands, cut up faces.
Shoot this, the details help tell the story of your climb and the climbing lifestyle.
Photograph the hike in, the hike out, the setup, the faces of your friends. Shoot as much as you can of everything, not only the action up on the wall.
My go to recipe, that I thank Corey Rich for, is:
- Capture a wide establishing shot. This is the shot that shows the sense of scale for the climb and climber.
- Capture an action shot. This is the shot that shows the climber jumping for that tiny hold and hanging on.
- Capture a detail shot. This is the climber's beat up hands, a piece of gear, their fingers gripping a hold.
Together these images are the start of a mini photo story. They bring the viewer into your adventure and help them relate to your subjects and the activity.
Pro Tips
- The details can supplement your actions photos and help give more context to the day.
- Get close to the ground. Sometimes the details are down low.
- Many amazing shots happen after the climbing is over. Have your camera at the ready during breaks, at belay stations, and when everyone is packing up.
- Don’t be afraid of the weather, this is part of the story of the day, and weather can often bring great contrast to your images.
Parting Thoughts
Was this post helpful? Want to see more tips, adventures, and awesome premium content?
I'd love if you share this or subscribe to my quarterly newsletter.